Install
You need VS Code 1.106+, a trusted workspace, Node.js 24 LTS, and an installed and signed-in executor. Use Linux, macOS, WSL, or SSH; on Windows, open your project through WSL. Install Node.js, the CLI and your executor in the same environment as the project.
Install the CLI. Extension 1.0.0 was tested with CLI 0.1.1-beta.5:
npm install --global @maestrun/maestrun@0.1.1-beta.5Open Maestrun in the Visual Studio Marketplace and click Install, or search for
Maestrun.maestrun-vscodein VS Code's Extensions view. From a terminal:code --install-extension Maestrun.maestrun-vscodeOpen your project folder and click the Maestrun icon in the Activity Bar, or run Maestrun: Open Maestrun from the Command Palette (Ctrl+Shift+P, or Cmd+Shift+P on macOS).
For a manual install, download the .vsix from the extension releases, run Extensions: Install from VSIX…, and select the file.
Choose how to work
| View | Use it for | How to open it |
|---|---|---|
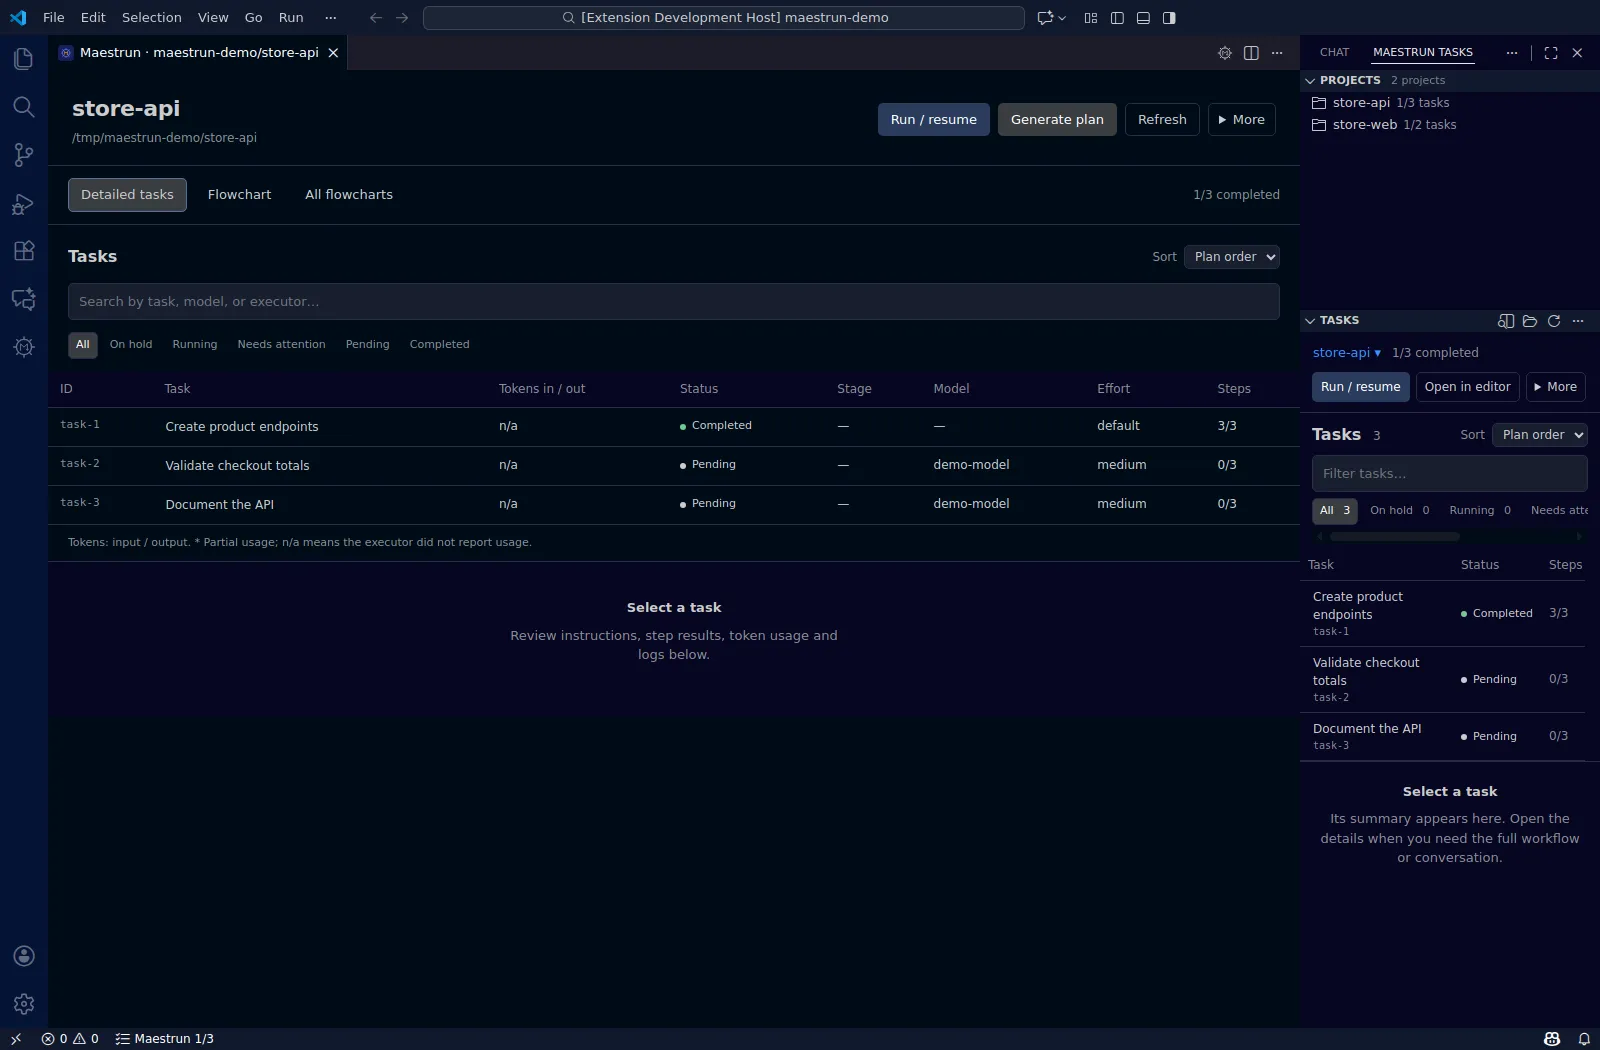
| Sidebar | Follow tasks alongside your code and switch projects | Click the Maestrun icon; Projects and Tasks start in the Secondary Side Bar |
| Editor dashboard | Search and filter tasks, inspect results, and read logs | Click Open in editor; select a task and choose View details |
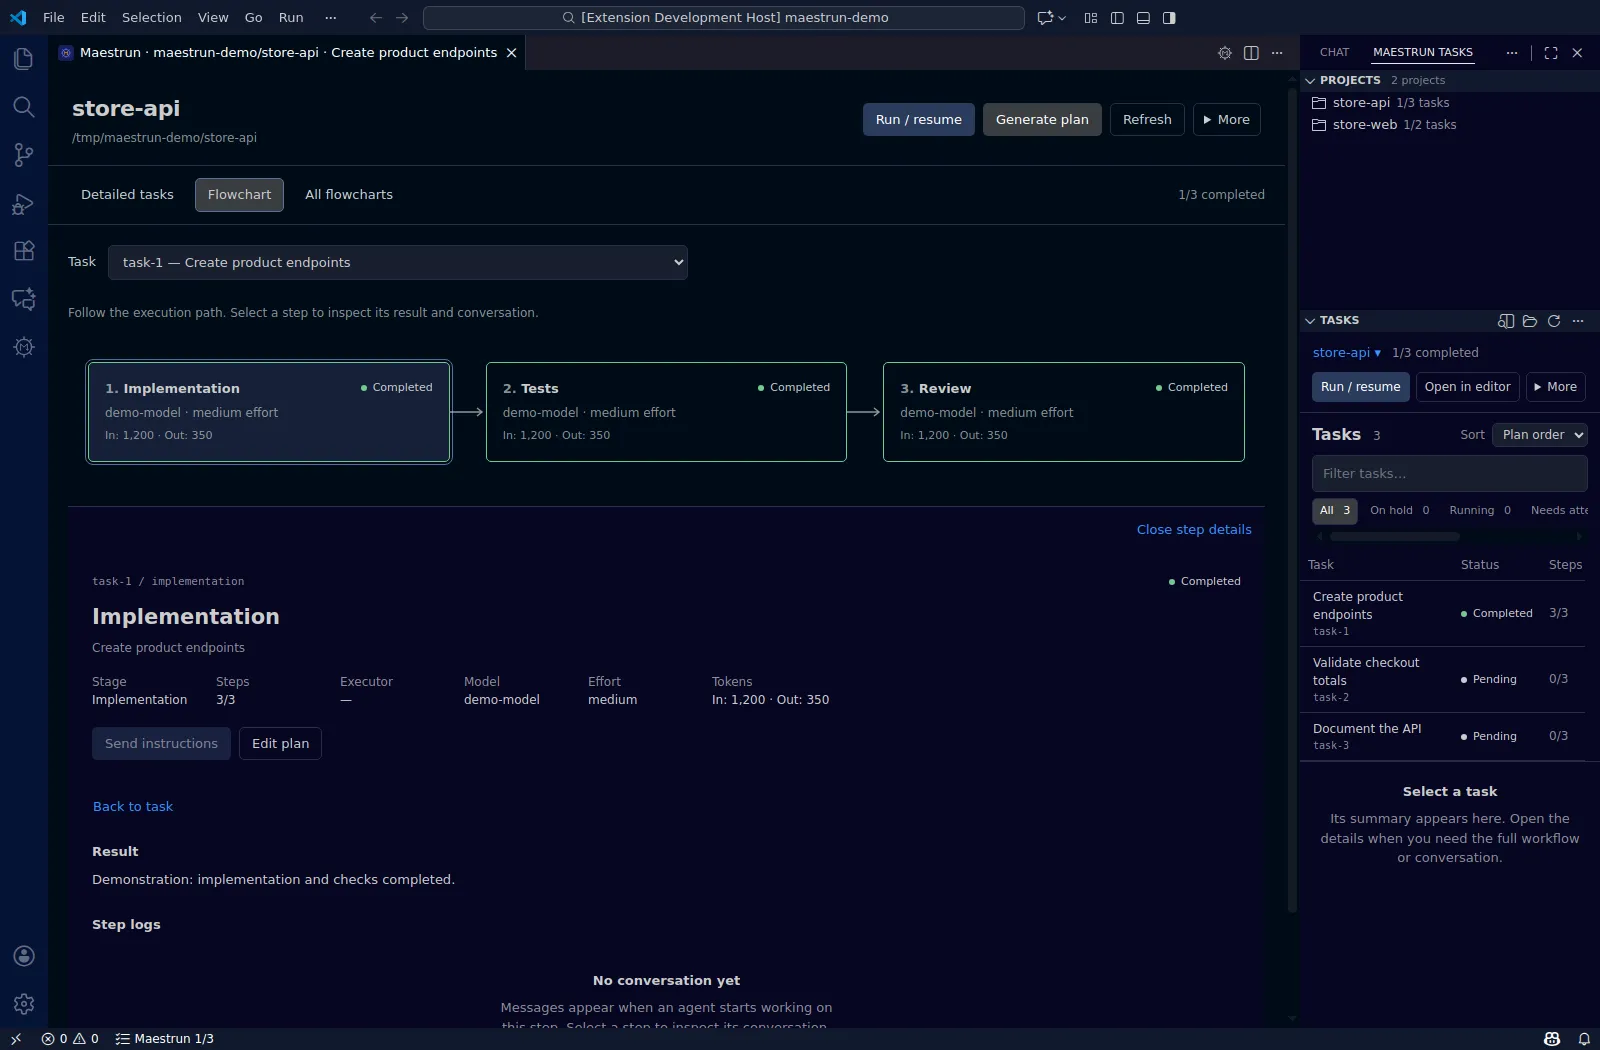
| Task flowchart | Follow each stage and inspect its output | Open Flowchart and click a stage |
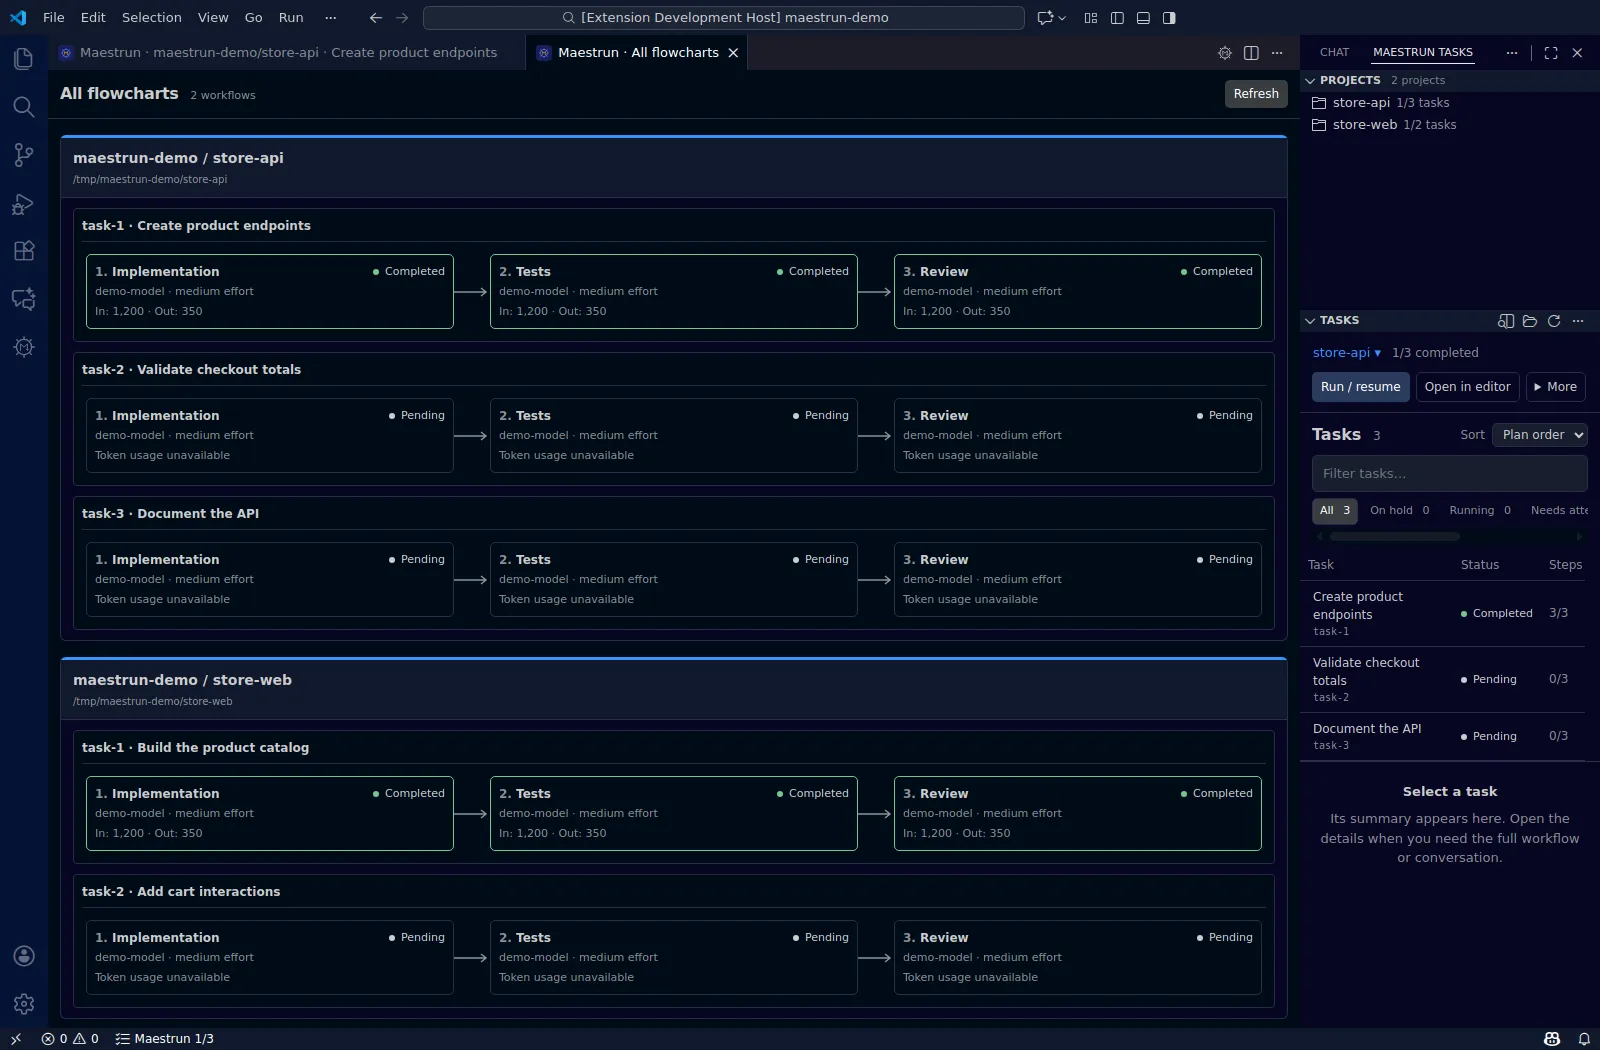
| All flowcharts | Compare task progress across projects | Click All flowcharts |
Run Maestrun: Choose window position to change where the views appear. Manual moves are remembered. The terminal stays available too: everything here maps to the CLI quick start.
Set up, plan and run
- Open More → Set up workflow.
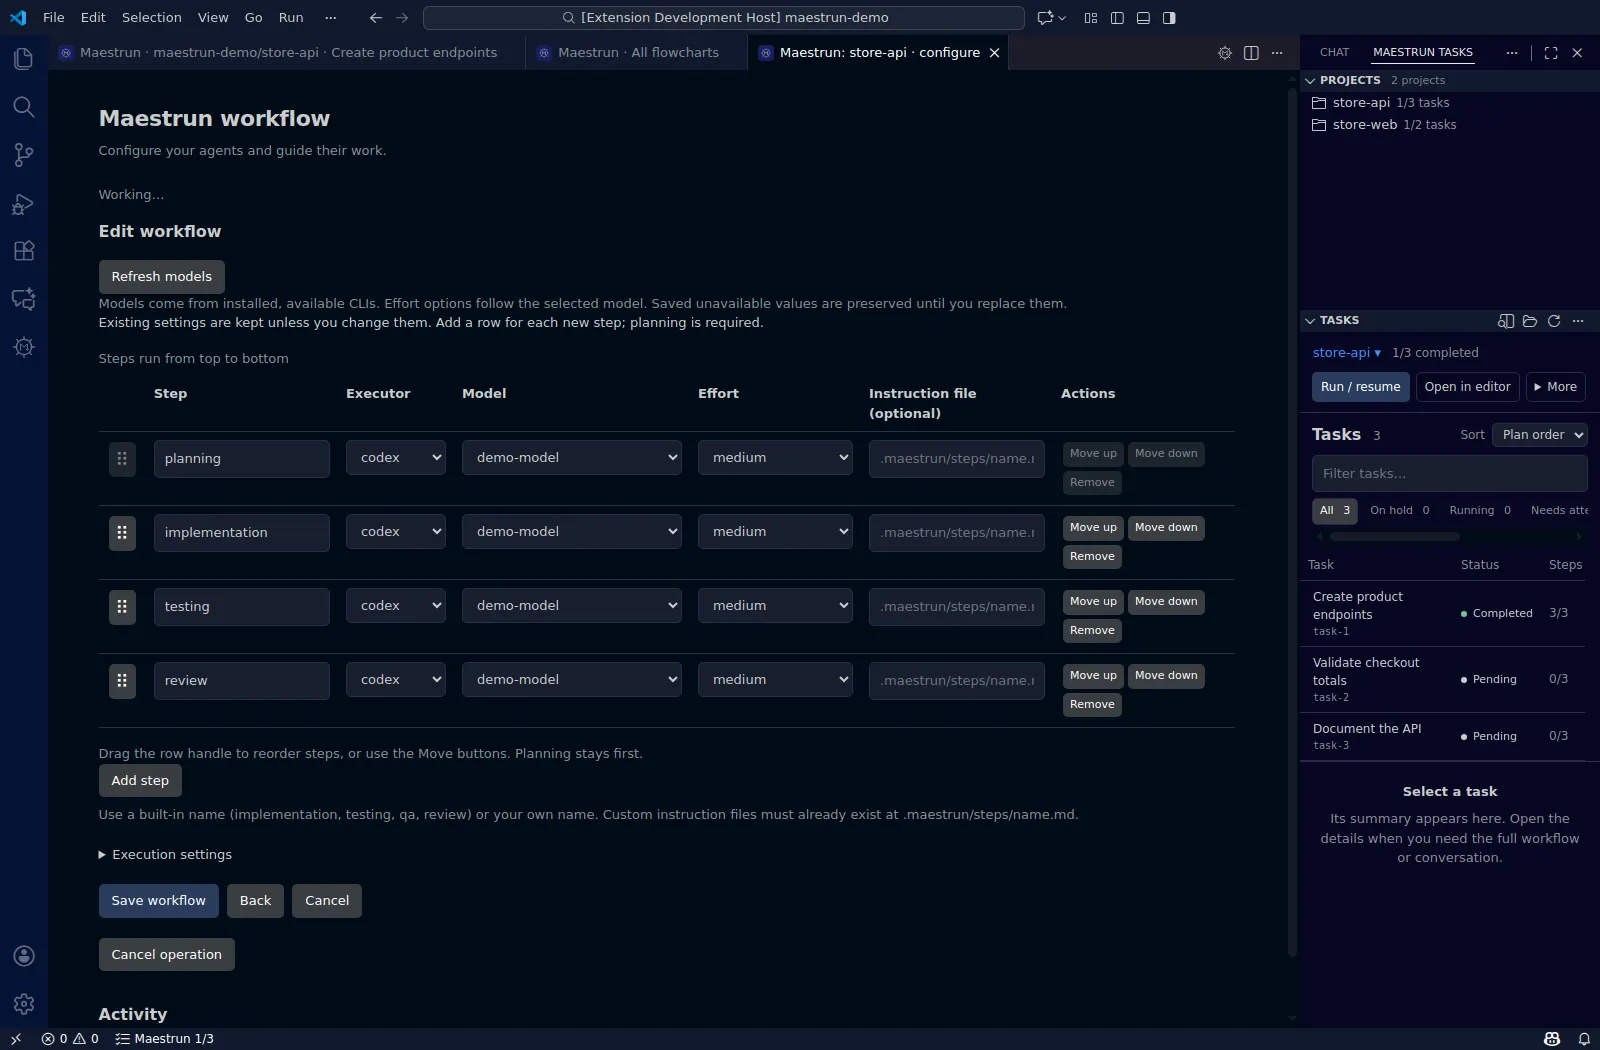
- Choose your executor, model, and steps, then save the workflow.
- Click Generate plan and enter your requirements or choose a file.
- Review the tasks. Use Maestrun: Edit plan to change the plan before execution.
- Click Run / resume.
To adjust a workflow, open Configure workflow → Edit steps and execution in a table. Set the executor, model and effort per step, drag rows to reorder them, and save to apply your changes. It writes the same .maestrun/config.json the CLI reads, so the advanced settings still apply.
Cancel execution stops the run and preserves completed work. Closing the dashboard does not stop a background run. Planning and execution use your executor account and consume its usage.
Inspect tasks and respond
Select a task in the sidebar, click View details, then open Flowchart. Click a stage to read its result and logs.
| Task state | What to do |
|---|---|
| On hold | Click Answer question and submit your response; use Run / resume if execution has stopped |
| Running | Follow progress, or use Send instructions when an active model session is available |
| Failed | Read the error and open View execution log before resuming |
| Completed | Inspect stage results and continue with the remaining tasks |
For operation errors, the notification's View logs action opens the Maestrun output channel.
Work with multiple projects
Click a project in Projects to update the sidebar. Use Open in editor to give a project its own dashboard tab, or All flowcharts to see tasks grouped by project.
Discovery finds .maestrun/config.json in workspace folders and their subfolders, including examples started from the terminal. Click Refresh to rescan, or use Select project → Choose another folder… for a folder that still needs setup. To remove an entry, hover the project and click the trash icon: a regular project loses only its .maestrun/config.json, while an example folder is removed entirely.
Try an example
Run Maestrun: Run example from the Command Palette, choose Simple or Advanced, then pick your executor and model and confirm.
| Example | What it demonstrates |
|---|---|
| Simple | Two sequential tasks with implementation and tests |
| Advanced | Five tasks with a pending approval, repair, Git integration, and an intentional failure |
Advanced requires Git 2.38+. Answer continue when prompted; the run ends Failed by design after the remaining work finishes. Both examples consume your executor account's usage.
Settings and troubleshooting
Open VS Code Settings and search for maestrun. For WSL or SSH, set executable paths in the remote environment's settings.
| Setting | Default | When to change it |
|---|---|---|
maestrun.executable | maestrun | The CLI is outside PATH; use its executable path or an absolute path to dist/main.js, with no arguments |
maestrun.nodeExecutable | node | Node.js is missing from PATH or the selected version is unsupported |
maestrun.tasksFile | plan.md | Your plan has another path, relative to the selected project folder |
If the CLI is missing, install it in the project's environment and click Refresh. If the panel is hidden, run Maestrun: Open Maestrun. The extension requires workspace trust and does not support virtual workspaces.
Found a bug? Open an issue with the extension and CLI versions and the error. Remove secrets from logs before sharing.
Screenshots show the real extension 1.0.0 interface with demonstration data; no paid model run is shown.